Arduino กับการใช้งาน Serial Monitor

Serial Monitor คือ ส่วนหนึ่งของโปรแกรม Arduino IDE สามารถใช้งานได้ 2 อย่าง คือ
- แสดงผลลัพธ์จากบอร์ด Arduino
- ใช้รับข้อมูลจากผู้ใช้ แล้วส่งข้อมูลไปยังบอร์ด Arduino
- แสดงผลลัพธ์จากบอร์ด Arduino
- ใช้รับข้อมูลจากผู้ใช้ แล้วส่งข้อมูลไปยังบอร์ด Arduino
รูปแบบการใช้งาน Serial Monitor
เริ่มต้นใช้งาน
เริ่มต้นใช้งาน
void setup()
{
Serial.begin(9600);
}
แสดงผลออกทาง Serial Monitor{
Serial.begin(9600);
}
Serial.print("Hello World"); /* แสดงคำว่า Hello World */
Serial.println("Hello World"); /* แสดงคำว่า Hello World และขึ้นบรรทัดใหม่ */
อ่านค่าจาก Serial Monitor
Serial.println("Hello World"); /* แสดงคำว่า Hello World และขึ้นบรรทัดใหม่ */
Serial.read();
วิธีเปิด Serial Monitor
1. กด Ctrl + Shift + M
2. กด Icon

ตัวอย่างการแสดงผลลัพธ์จากบอร์ด Arduino
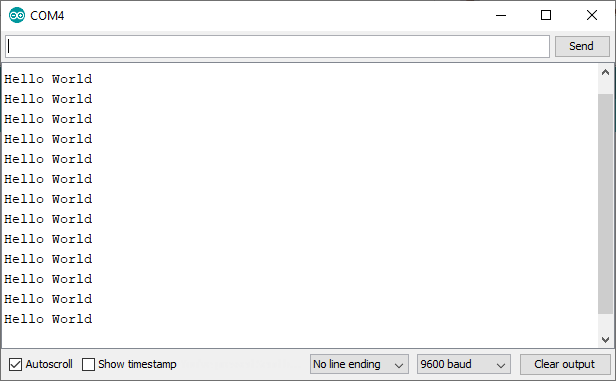
แสดงผลลัพธ์จากบอร์ด Arduino
ตัวอย่างการรับค่าจาก Serial Monitor
- ส่ง 1 เพื่อ On LED
- ส่ง 0 เพื่อ Off LED

แสดงผลลัพธ์การรับค่าจาก Serial Monitor
* ถ้าไม่สำเร็จ ตรวจสอบว่าเลือก No line ending และบอดเรทเป็น 9600 เเล้วหรือยัง
Comments
Post a Comment