Arduino - LCD (Liquid Crystal Display)

This article will give you an example of how to use Arduino board with 16x2 Liquid Crystal LCD (16 characters in 2 lines). Examples applications, Arduino boards send text or output from sensor to show on LCD screen.
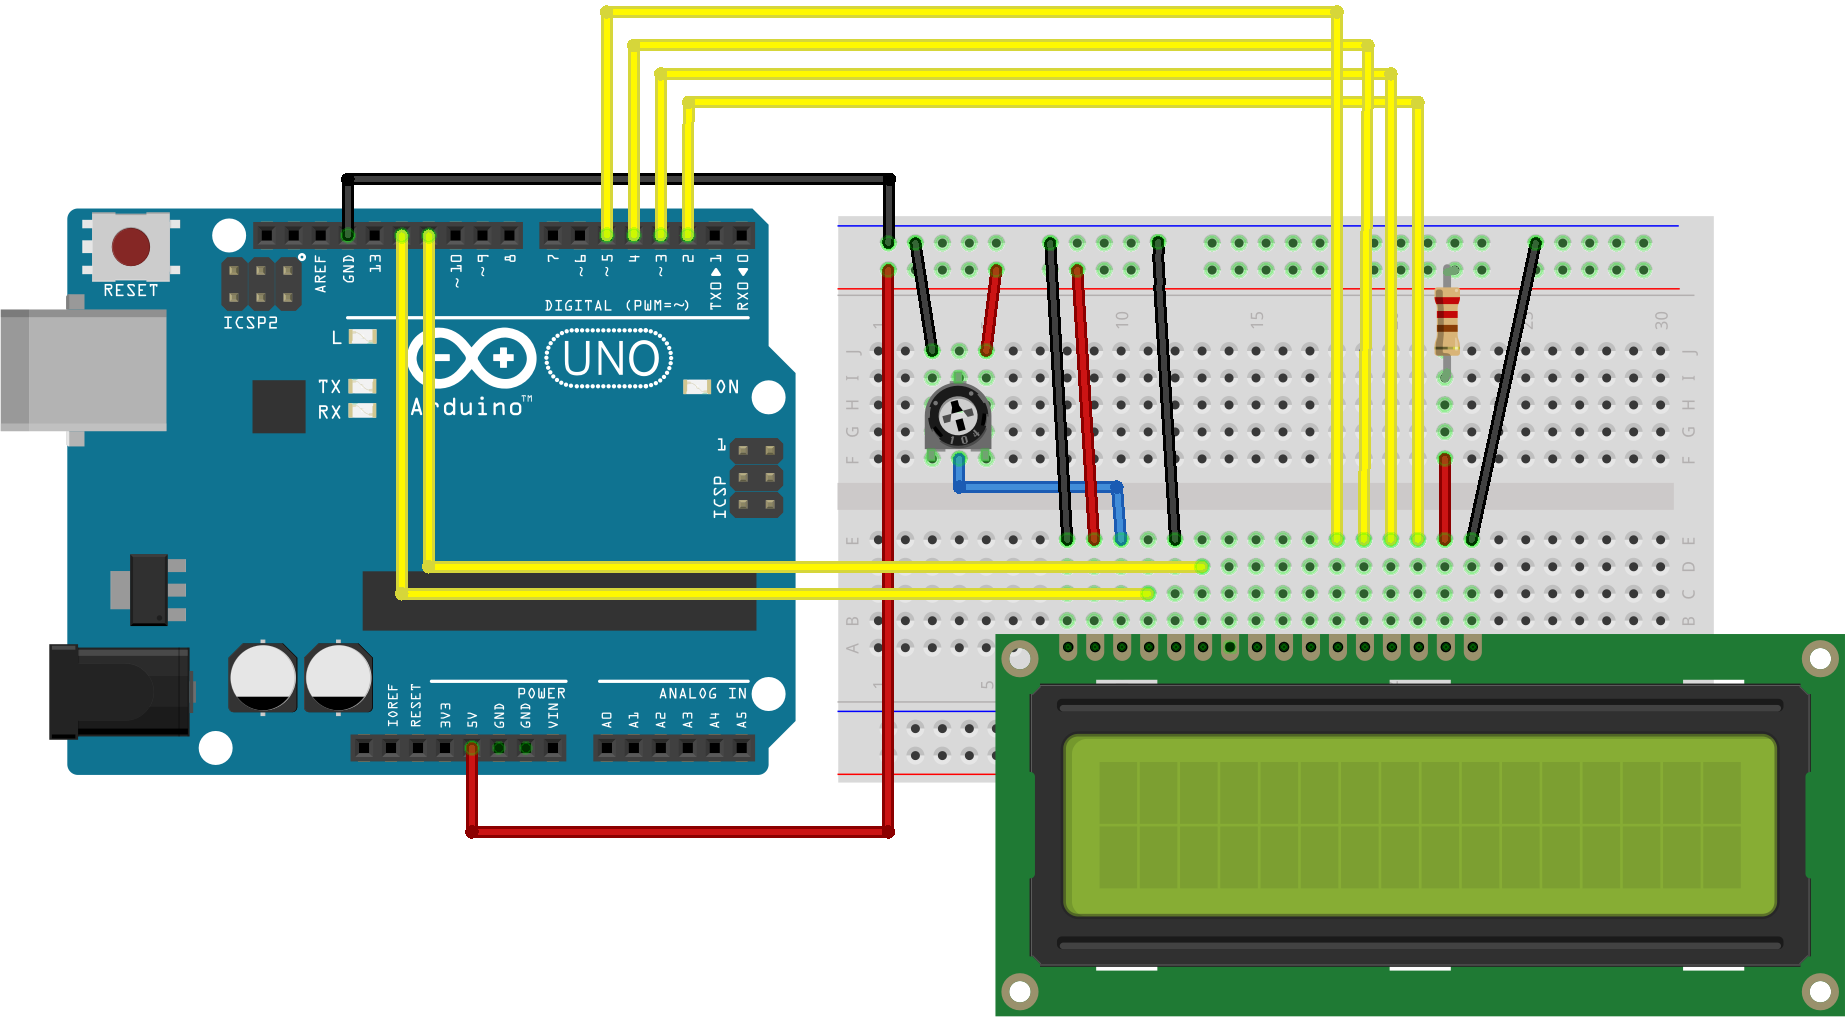
LCD pin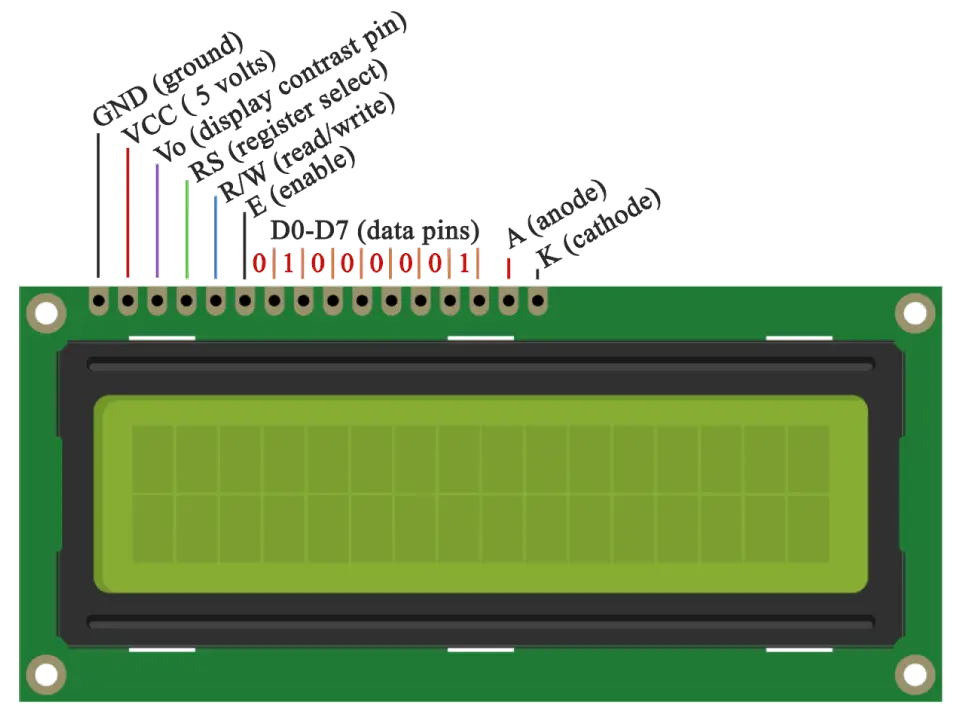
- LCD RS pin to digital pin 12
- LCD Enable pin to digital pin 11
- LCD D4 pin to digital pin 5
- LCD D5 pin to digital pin 4
- LCD D6 pin to digital pin 3
- LCD D7 pin to digital pin 2
- LCD Vo pin to Output from potentiometer 10k Ohm for adjust the contrast of the character.
- LCD Anode to resistor 220 Ohm for power the backlight of the display
- LCD Cathode to GND
Example Program
#include <LiquidCrystal.h>
const int rs = 12, en = 11, d4 = 5, d5 = 4, d6 = 3, d7 = 2;
LiquidCrystal lcd(rs, en, d4, d5, d6, d7);
void setup() {
// set up the LCD's number of columns and rows:
lcd.begin(16, 2);
// Print a message to the LCD.
lcd.print("hello, world!");
}
void loop() {
// set the cursor to column 0, line 1
lcd.setCursor(0, 1);
// print the number of seconds since reset:
lcd.print(millis() / 1000);
}
Output this program
* If LCD not show characters try adjust the potentiometer
Referent
- https://www.arduino.cc/en/Tutorial/HelloWorld
Comments
Post a Comment